Feeds:
Posts
Comments

Breakfast Bundt Cake

Or Christmas Butt Cake…as my kids call it! lol

Pre-heat oven to 350 degrees.

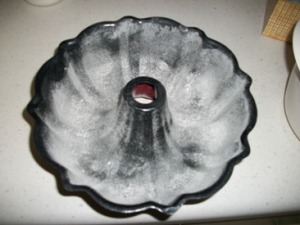
Grease and flour bundt pan. This step is very important if you want to get your cake out of the pan in one piece.

Next mix the following until blended:

  • 1 box yellow cake mix
  • 3/4 cup oil
  • 4 eggs
  • 1 T butter extract
  • 1 box instant vanilla pudding (small- the only size I can ever find the “instant” in)
  • 3/4 cup water
  • 1 T vanilla

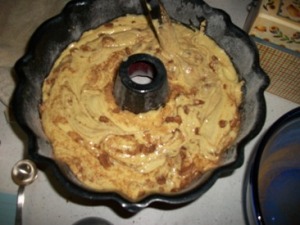
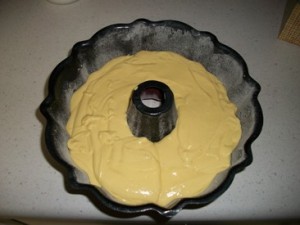
Then pour it into your floured bundt pan.

Then combine

  • 1/2 c chopped nuts- I use pecans
  • 1/4 c sugar
  • 2 t cinnamon

Sprinkle this mixture over the batter and marble in with knife. (Just swirl it a bit with a knife. I think the term comes from how marble looks like it has paint streaked through it.) I may have gotten carried away while talking on the phone and stirred a little bit instead of just “marbling” the mixture in. Anyway, it won’t mess up the cake.

Then you bake it at 350 degrees for about 45 min. I usually have to bake it a little longer. The top (well, bottom) of the cake should not be gooey.

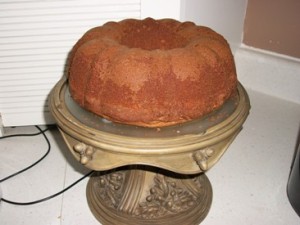
Then you need to take it out and run a small spatula or plastic spoon around the sides of the pan. You can use a knife I guess, but knives scratch my pan. Then place a plate upside down on top of the cake and flip it over so that the cake will now be right-side up on the plate. I always have to shake just a little quite firmly to get it to drop out.

Lastly, you mix

  • 1 c powdered sugar
  • 3 T milk
  • 1/2 t vanilla
  • 1/2 t butter extract

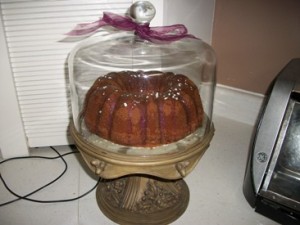
and pour it over the cake. If I am serving it for breakfast, I don’t always put the icing on top. It makes a great dessert with coffee.

Credit Monitoring

Many people pay for credit monitoring and while I do see the value in this I never actually want to pay for it. By law though you are allowed to see your credit report, not score, from each of the three credit reporting companies once a year. This allows you to see if the information is correct and to make sure that no one else is using your name and social security number. You can also see if there are any items in collections on your account. Getting this report does not affect your score because they are not actually running your credit and they do not give you your credit score. It is just a safety measure for you to identify identity theft.

When hubby and I went to buy our first house we found out that someone had used my name and social security number to activate a phone account somewhere in Illinois. It had been in collections for about 2-3 years and we didn’t even know! To get it off of my credit I had to file a report with the police department (a detective came to my house and asked me questions about it), then I had to file this police report, notarized copies of our apartment leases to show we were not living in Illinois at the time, and a letter to all three credit companies before they would finally take it off my report. Whew! Anyway, it is a good thing to know what is on your report before you are trying to buy something.

Now, how to monitor your credit. This is just my opinion, you can do it anyway you like, but I think my way is pretty good. 🙂

Go to https://www.annualcreditreport.com. This is the site set up for you to get your three free reports (one from each company) yearly. If you go to freecreditreport.com you will be enrolling in “Triple Advantage Credit Monitoring” for $14.95/month. Ugh. Ok, so get the correct site. Then I would suggest only getting one from one of the companies: TransUnion, Experian, or Equifax. The information on any one of them should be the same on all of them. So I order one, wait about four months and then order one of the other ones, wait about four months and then order the one I haven’t gotten for the year. In this way I can “monitor” what is on my credit reports. If you order all three at once you have to wait a year before you can order them again. Be careful though, even on this site there are products that you can “check” and will be charged for.

Hope you find this helpful and happy credit monitoring!

Peace Prize Anyone?

These are for families visiting with small children. Go figure!

Several times I had to wait with my three-year old and one year old while my husband and five-year old rode a “big ride” that the little ones couldn’t ride. We discovered the penny presses located near the exits of the rides and in shops. Yes, I spent 50 cents to $1.50 every time we had to wait, but Little-bit really had fun and was excited when we got to go look for a penny press. Sure beats sitting bored. Or worse, tears cause she didn’t get to go on the ride. Walt Disney World sells little collector’s books for the pennies and Little-bit had a great time showing everyone the pennies she had found.

When my family went to Walt Disney World, we treated the Walt Disney World RailRoad in Magic Kingdom as a ride…one we weren’t interested in. With little ones though, I highly suggest hopping on! It beats lugging everyone across the park. You can hop on at the entrance and get off right between Splash Mountain and Big Thunder Railroad or you can get off in Mickey’s Toontown Fair. Mickey’s Toontown Fair doesn’t open until 10 am. It is a great place to meet characters and for “shorter” people to get to ride a rollercoaster. The height requirement is only 35 inches, so Little-bit rode it six times! 🙂

Christmas Tour of Homes with The Nester

Well, I am a little late as usual, but I just found out about the tour and thought it would be fun.

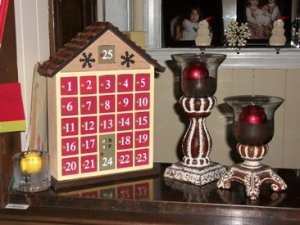
Here is our Advent calendar/goody house that we haven’t used this year.

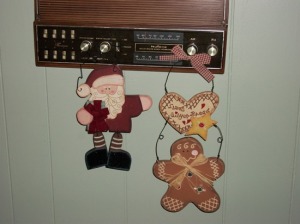
Don’t these look lovely hanging on the old house radio?!? 😉

And here is our other tree. Whose lights worked when I set it up a couple weeks ago, but now only a small band around its “waist” work…sad.

All of the ornaments on this tree are handmade by my mil!

Hope you enjoyed your “tour”!

Needed for this project:

  • Sewing Machine
  • Fabric (just over two yards)
  • Elastic
  • Pins

I have trouble finding skirts that I like that fit the way I want them to. So I have started making my own skirts. When you pick your fabric at the store be sure to look for the washing instructions on the end of the bolt. You want to be sure to get fabric that will work with your washing habits. I need just over two yards to make a long skirt, but I am short. I like the fabric selection at JoAnns. They also have 40% off coupons weekly, so I always take a coupon and get a good deal on fabric. Most of my skirts cost less than $15 to make.

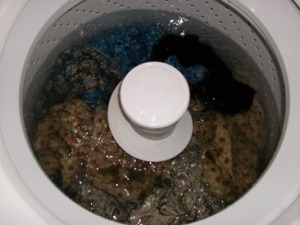
Once you have your fabric you will want to wash and dry it according to the instructions you checked in the store. I did not include the washing time in making the skirt.

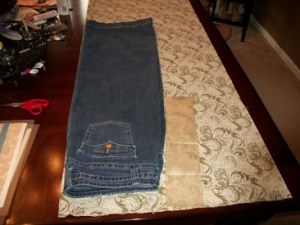
If you have a pattern you could use it to cut the fabric. I do not have a pattern, but for the type of skirt I like I don’t really need one. I just use a long straight skirt that fits and add a little to it. You can see below that I would add about three inches to the fullness of my straight skirt to get the look I like. You will need two of these cut out of the fabric. You will also need to have 3-4 extra inches in length for the hem and elastic waist.

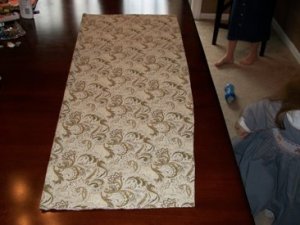
Here is what my fabric looked like after I cut it out. I really didn’t mean for the fabric/skirt to get narrower at the bottom of the skirt, but it turned out fine. Generally though I would say to keep the bottom of the skirt wider than the top!

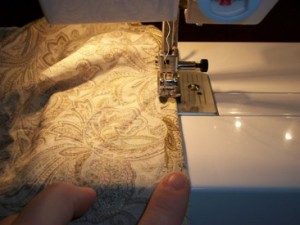
I first sewed the top by folding it down 1/4 inch and sewing. You can do this first if you are making a long skirt and slight length changes would not show. Otherwise you might want to do the sides (next step) before this one.

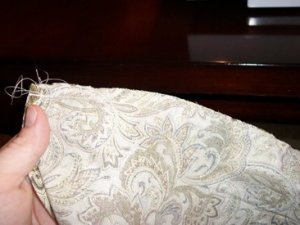
Next place the right sides together and sew the sides. I sewed the sides and then zig-zagged them to help prevent fraying.

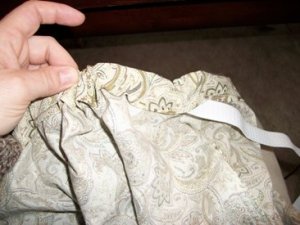
Then fold the waist down again and sew, leaving a 1 inch hole to work the elastic through. How much you fold down depends on what size elastic you get. I would recommend 3/4 inch or 1 inch elastic. You want to be sure to sew it so there is enough room for the elastic without it folding over in the skirt. (This step doesn’t have a picture, but you can see what I did in the next picture.

Attach a safety-pin to your elastic and work it though. Be sure to safety-pin the elastic and try it on at this point. Make any necessary adjustments to the elastic then sew it back and forth several times. After the elastic is sewn tightly, you can sew up the hole you left. At this point try it on again and see how much you need to hem.

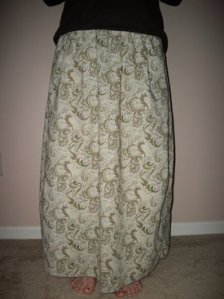
Lastly, fold the bottom of the skirt over twice so that no unfinished edge shows and pin in place. This is the hem. Once you sew this you have a finished skirt! It honestly does take about an hour. I actually made this skirt one morning before church because I didn’t have anything I wanted to wear.

1. TourGuideMike.com

This site has wonderful information from Mike who was a VIP private guide at Walt Disney World. He will tell you which rides he recommends, which to ride first, in which order to ride… you get the point. He has sample itineraries for each park and even has recommendations for which day to go to each park based on when you are going. To access everything on his site you do have to pay $21.85. (Unless the rate went up) But it was worth every penny-we waited 10 minutes or less for everything that we did according to his schedule. Which is pretty impressive. I know we went during a “slow” season, but I am always amazed at just how many people are there.

 2. Get to the parks early

One of Tour Guide Mike’s BIG things though is that you be at the park a few minutes before opening time. So if you know that your party won’t do this you might not want to purchase that. I think it is completely worth it- getting up early and all. I mean, how much are you paying for this trip? And when will you be there again? We were done in most parks with about everything we wanted to do by 1:30 or 2:00 and then headed back to the room for rest. We did go back to the parks some evenings for parades, dinners, or the dancing lights in Hollywood Studios. We were at the parks for opening four of the five days of our vacation. (My family is shocked! :-))

3. Disney Dining Plan

Truly, I think this may have been the best decision I made for this trip. I was dreading eating the same burgers and chicken and fries for every meal like we usually do when we pick the closest place and cheapest things to eat in Walt Disney World. We got the Basic Dining Plan which included 1 counter service meal, 1 table service meal, and 1 snack per person per night in their resort. We ate like kings! It was so much food. We got to eat at really nice places with characters and princesses. We didn’t have to wait in lines to meet many characters because they came to us while we ate. We ate at 1900 Park Fare in the Grand Floridian, Akershus Royal Banquet Hall in Norway (Epcot), Planet Hollywood, Play ‘n’ Dine at Hollywood and Vine, The Plaza on Main Street in Magic Kingdom, and at the Whispering Canyon Cafe in the Wilderness Lodge. Those were the table service meals. Most of these were $100 or more without the dining plan. So it was really nice to just have to pay the tip. I think that adding the dining service added about $600-$700 to our total package, but we would have spent a lot more than that to eat everywhere that we did. And that is just my point! We would not have eaten at these places if we hadn’t purchased the dining plan. It made the vacation very fun to have nice food and characters to eat with. 🙂 You should be warned though: most of the character dining meals were buffets. Great food- just difficult with three small children and two adults. One of us sat with the kids while the other made about forty trips to the food for us. Also, if you are expecting a nice quiet, peaceful meal you will be disappointed. The restaurants are generally packed and noisy. HOWEVER, with small children this was rather nice. I was not concerned about whether my kids fussed a little or whether they were keeping their voice quiet. There were characters that would come out and sing or do skits.

4. Book early and get the dining reservations that you want.

Although we did have wonderful meals and ate with the characters we wanted, we did not get to eat in Cinderella’s castle and we did not get to eat at the Supercalifragilistic Breakfast with Mary Poppins (my kids fav- go figure!).  So if I had it to do over this might be the only thing I might change. The online booking system on the Walt Disney World website is the same booking system that is available to the representatives you call if you try to book on the phone. Cinderella’s Castle does take two of your table service meals though if you are lucky enough to book it. They accept dining reservations up to 180 days in advance, so seriously, book early. I spent 30 minutes a day for a week or two before our trip just trying to get all of our meals booked. I actually booked our last dining reservations on our trip. You do want to book these based on which park you will be in on any given day, so be sure to check with Tour Guide Mike’s park recommendations before you book meals.

5. Pack ahead of time.

I know this is not always possible. However, for us it was. We went in December and were able to pack summer clothes for our trip and some of our toiletries that I had stockpiled. This made it possible for me to have the house cleaned when we left. Which made for a very happy homecoming! 🙂
On Vacation

I know I haven’t posted in about 3 weeks. I have really missed blogging. I have so much to tell you all. 🙂 We have had a wonderful vacation and will be back in a couple of days. I am looking forward to telling you all about our trip. I appreciate all your prayers while we have been gone.

Here is a picture for you!

Pineapple Casserole

My family loves pineapple so this is one of my favorite recipes that we fix for Thanksgiving. Sorry I don’t have a picture yet. I will update with a picture after Thanksgiving. 🙂

Baked Pineapple Casserole

  • Two 15 oz cans of pineapple tidbits drained, save the juice in a bowl to use later
  • 1 cup sugar
  • 1 cup cheddar cheese finely shredded
  • 5 T flour
  • 1/3 cup pineapple juice, from canned pineapples
  • 1 stick of butter melted
  • 1 stack Ritz crackers crushed

Preheat oven to 350 degrees. Put drained pineapple in a 8 x 8 baking dish. In a bowl mix sugar, cheese, and flour. Then pour this mixture over the pineapple. Next pour 1/3 cup of the saved pineapple juice over the sugar/flour/cheese mixture. In a bowl mix the crushed crackers with the stick of butter and then spread this on top. Bake for 25-30 minutes at 350 degrees.


Name Change

Half pint does not like her cyber name. She has requested that I change it to Little Bit. Since this new name conveys the same meaning, I have decided to comply with her request. So let it be written, let it be done. From here on Half pint will be called Little Bit….until I slip up and use the wrong name. 🙂 She picked a couple of pictures for me to put on here with this post.

Little Bit says, “With this ice cream beard I really don’t look like me. You might want to say blog.” She and overachiever are always telling me to take pictures of things to put on my blog. Oh my little bloggers! lol